
Thursday, May 22, 2014
Fireplace Wreath
It's been a while since I last made a geo mesh wreath, but I decided it's time to make one for the fireplace to work with the living room decoration. After four years of decorating for every holiday, I've decided it is time to get something that can stay put year round! The cream colored geo mesh adds a little shine and sparkle to the otherwise dark fireplace, and the blue burlap worked great to hide the wreath wire in the back since it is more solid than the hole-y mesh.
Cooper's Big Boy Bed
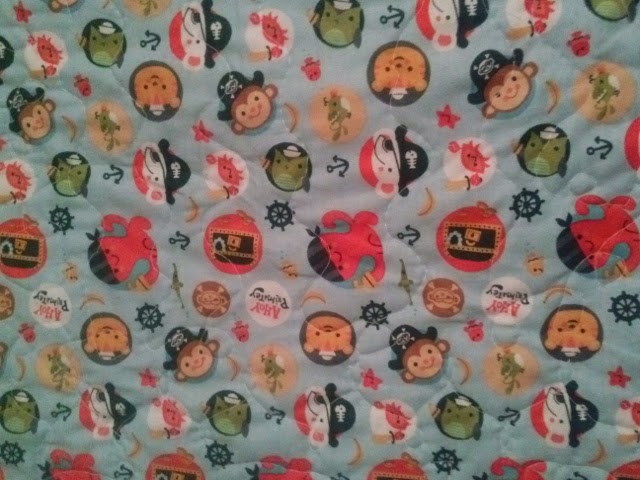
It is time for my 1 1/2 year old nephew Cooper to move on up to a big boy bed. So what better way to help him adjust than to make him a quilt to match his bedroom! This quilt is special for me because I actually created the design layout and figured out the dimensions in order to accommodate the size of his bed. His room is nautical themed so I found a paper-pieced sailboat design which I then had to enlarge to fit with my dimensions. The initials were appliquéd with a zigzag stitch. I also enlarged them to fit the pattern more proportionately than the original sized letters I downloaded. The back is a kid friendly pattern of sailor octopus, crabs, and monkeys. I used a simple quilting design of waves and loops and then attached a white binding around the perimeter to complete the quilt. I just delivered it last weekend, so hopefully the next time I go to Cooper's house, I can get a picture of it on his bed. :)

Welcome Baby Jonathan!
Unfortunately, this quilt got "lost" in the midst of working on the t-shirt quilt and the block of the month quilt, but I wanted to make sure to give it the 15 seconds of fame that it is due.

This was a simple pattern using fat quarters that made a really cute baby quilt. I knew Baby Jonathan's nursery was decorated with monkeys, so I found the middle fat quarter and then grabbed some coordinating fat quarters to bring out the red, turquoise, and brown in the dominant pattern.
I used a simple straight stitch quilting technique approximately every 4" and then brown backing and binding fabric. Baby Jonathan's mom even asked me to sign the quilt like a piece of art....how cool is that!?!?
Block of the Month 2012 quilt finished!
So it only took a year from start to finish to complete this quilt...and I say that with a deep sigh of relief for finally being finished! The Craftsy class was a lot of fun, and I learned several new techniques and strategies for constructing numerous types of blocks. I used the Asterisk block in a baby quilt, am making a quilt for the master bedroom using the block, and even attempted a paper-pieced sailboat block for my nephew's quilt.
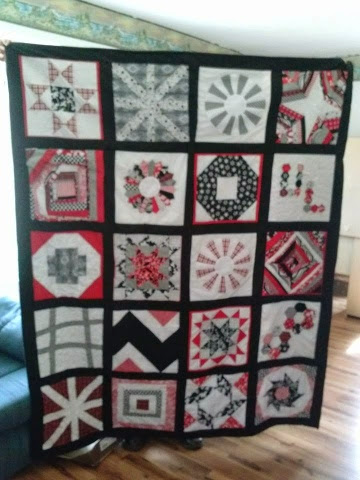
I presented the quilt to my parents as a Christmas (in March) gift. They are huge Louisville Cardinal fans, so I knew they would enjoy the red and black color scheme.
Quilting the layers together was the most difficult part, just because my sewing machine is regular-sized and the middle especially was hard to position under the needle and move around since space on the left was limited. Maybe my next Craftsy class will be learning how to quilt on small machines!
For the back, I used some scraps and the Dresden tool to create a straight line of color to connect the solid black pieces together. I need to get a picture...it really turned out cool! The black binding was stitched to the back and then hand sewn to the front. That took a while, too, but thankfully Basketball season was still in swing so I could work on the binding in the same room that my husband was watching his Wildcats...yucky!!!
Overall, I am very proud of the work put into the quilt and the finished result!
Subscribe to:
Posts (Atom)